
This is an old post. It may contain broken links and outdated information.

Etherpad Lite is a real-time collaborative text editor which allows multiple users to simultaneously fiddle with a document. Everyone can see everyone else’s changes in real time, which is really cool. The “lite” tag after the name is there because the Etherpad Lite project was spawned from the ashes of the original Etherpad project, which itself was snapped up by Google and transformed into the ill-fated Google Wave. Wave was never really all that popular and has since been killed, but the core idea is still totally cool—to present a document to more than one user and have all users be able to make changes to it, and to have those changes shown to all other users as they’re made. It’s a surprisingly complex problem to solve. For one thing, it’s entirely possible that more than one user can change the same thing at the same time; there has to be a way of telling who “wins” and whose changes are tossed out. Even more complex is figuring out a way to track all the changes and organize them, and then display them for everyone.
The original Etherpad project solved this with a full mix of heavy web technologies, requiring you to install Java, Scala, and MySQL; it utilized no small amount of server resources and was difficult to scale. Etherpad Lite jettisons a lot of its predecessor’s bulk and does things in a much more web two-point-oh fashion. Specifically, Etherpad Lite runs on Node.js, a server-side Javascript engine which can be used for lots and lots of fancy things—Node is really deserving of its own blog entry, and we’re using only a tiny subset of its features here. Etherpad Lite also needs a database to hold the documents and store changes; out of the box it can use MySQL, but in this post we’re going to take things even further and configure it to run on Redis, an extremely fast memory-based key-value store. Finally, we’ll do a tiny bit of hacking on Etherpad’s HTML to force it to display a list of all the “pads” (documents) currently in its database.
Prerequisite list
There are a number of dependencies which Etherpad requires—we need Node.js and Redis, most obviously, and we also need to add repositories for them to ensure we get current versions. If you’re not on Ubuntu or another Debian-based GNU/Linux distro, then you’re on your own for installing the prereqs; if you’re using a different operating system all together, then you’re on your own for the whole thing.
You’ll also need a functioning Nginx install (with HTTPS working) for the method we’re going to use. Rather than worrying about locking Etherpad and Node down, we’re going to be reverse-proxying to it from Nginx. This gives us immediate security and enhanced configurability without us having to know a whole lot about Node (which, admittedly, I don’t). I’m sure it’s also possible to use Apache, but I don’t use Apache and so I didn’t spend any time trying to figure out how to adapt the config to it.
Repositories
First, we need to add a pair of repositories so that we have the most current versions of Node.js and Redis:
$ sudo add-apt-repository ppa:chris-lea/node.js
$ sudo add-apt-repository ppa:chris-lea/redis-server
$ sudo aptitude update
These two commands will add the PPAs we require to our sources list, and then refresh the list. Now, we’re going to install Node, the Node Package Manager, Redis, and Git if you don’t already have it:
$ sudo aptitude install nodejs npm redis-server gitThis will likely also trigger a bunch of dependencies to also be installed—approve them all so that we can get rolling.
Etherpad Lite cloning
Next we need to get Etherpad Lite pulled down and ready to use. The easiest way to do this is by creating a local clone of its repository on Github, which also gives you the ability to easily keep it up to date by doing a git pull whenever there’s new code available. You’ll want to put Etherpad Lite in a directory which is accessible by Nginx, so that Nginx can proxy to Node.js, so pick a place and navigate there, and then fire up git to pull down the code:
$ git clone 'git://github.com/ether/etherpad-lite.git'This will create a etherpad-lite subdirectory under your current working directory and recreate the Etherpad Lite git directory there.
Start Etherpad as a service
We next want to get Etherpad Lite running as a service, so that it will be available when your server starts up. There are a number of ways of accomplishing this, but the easiest is described here, which describes how to create a new-fangled Upstart job for Ubuntu server. The first step is to create a service account for Etherpad Lite to run under. This kind of thing is normally done by a package’s install script, but we need to do it ourselves here. We want the service account to be named “etherpadlite” so it’s obvious what it’s for, so run the following command:
$ sudo adduser -M etherpadliteProvide the user a password (which you should write down!) and accept all the defaults. The -M switch ensures that the system won’t create a home directory for the user (who will never actually log on, and so doesn’t need a home directory).
Next create a directory in which to stash your Etherpad Lite log files, which can be a simple sudo mkdir /var/log/etherpad-lite, followed by a sudo chown -R etherpadlite:adm /var/log/etherpad-lite to set the directory’s ownership to the Etherpad Lite account and the local admin group.
The logs will need to be rotated, and we can piggyback on the system’s logrotate daemon by creating an etherpadlite file in /etc/logrotate.d/ and pasting the following inside:
/var/log/etherpad-lite/access.log /var/log/etherpad-lite/error.log {
  daily
  rotate 7
  missingok
  compress
  delaycompress
  missingok
}
These are just the parameters I’m using—you can of course adjust to taste.
Now that we’ve laid the groundwork, we can actually set up the Etherpad Lite upstart job. Create a file named etherpad-lite.conf under /etc/init/ and paste in the following:
description "etherpad-lite"
start on started networking
stop on runlevel [!2345]
env EPHOME=/var/www-etherpad-lite
env EPLOGS=/var/log/etherpad-lite
env EPUSER=etherpadlite
respawn
pre-start script
chdir $EPHOME
    mkdir $EPLOGS						||true
    chown $EPUSER:admin $EPLOGS			||true
    chmod 0755 $EPLOGS					||true
    chown -R $EPUSER:admin $EPHOME/var	||true
$EPHOME/bin/installDeps.sh >> $EPLOGS/error.log || { stop; exit 1; }
end script
script
  cd $EPHOME/
  exec su -s /bin/sh -c 'exec "$0" "$@"' $EPUSER -- node node_modules/ep_etherpad-lite/node/server.js \
    >> $EPLOGS/access.log \
    2>> $EPLOGS/error.log
end script
You’ll want to set the EPHOME value to the directory into which you cloned Etherpad, the EPLOGS value to the Etherpad log directory we previously created, and the EPUSER value to the name of your Etherpad Lite user.
Verify that your script works and everything is correctly installed by typing sudo etherpad-lite start. You can check the Etherpad log files to make sure something is happening—we haven’t finished configuring Etherpad yet, but the script shoudl be starting Node.js and telling it to launch Etherpad and you should see some log file activity. Stop the service with sudo etherpad-lite stop and let’s move on.
The Nginx part
We now turn to Nginx. The idea here is to set up Nginx between the Big Bad Internet and Etherpad, in order to take advantage of Nginx’s security and speed. In fact, we’re going to actually route all traffic through TLS/SSL—it simplifies the configuration and ensures that everyone’s connections to Etherpad are automatically encrypted. Nginx will function as the SSL terminator and pass traffic unencrypted internally to Etherpad.
To get this part running, set up a new server (a new vhost, in Apache terminology). My preferred method for doing this is to navigate to /etc/nginx/sites-available/ and create a new file there, called etherpad, and paste in the following:
server {
    listen 80;
    server_name pad.yourdomain.com;
    rewrite ^(.*)   https://$server_name$1 permanent;
}

server {
    listen 443;
    server_name pad.yourdomain.com;
    ssi on;
    ssl on;
    ssl_certificate /path/to/your/certificate.crt;
    ssl_certificate_key /path/to/your/private.key;
    ssl_protocols SSLv3 TLSv1 TLSv1.1 TLSv1.2;
    ssl_ciphers ECDHE-RSA-AES256-SHA384:AES256-SHA256:RC4:HIGH:!MD5:!aNULL:!EDH:!AESGCM;
    ssl_prefer_server_ciphers on;
    ssl_ecdh_curve secp521r1;

    location / {
        proxy_pass http://localhost:9001/;
        proxy_set_header Host $host;
        proxy_buffering off;
    }
}
This tells Nginx to listen on ports 80 and 443 for inbound connections to pad.yourdomain.com (which you would obviously replace with your actual web server hostname). If the connections come in on port 80, they are imediately redirected to the secure site and transformed into HTTPS requests. The server set up on port 443 has the same standard SSL configuration block that I’ve used elsewhere in the site, setting up the paths to the site’s certificate and key (I’m using a class 2 wildcard certificate from StartSSL, so I only need a single cert for all hosts in the bigdinosaur.org domain) and the allowed protocols and ciphers. The traffic is then proxied (not redirected like above, and the distinction is important!) to port 9001 on the same web server, which is where Etherpad Lite’s Node.js instance is listening for incoming connections.
Traffic between the public Internet and the web server is encrypted via SSL/TLS, but the reverse-proxy connection Nginx establishes back to Etherpad is unencrypted—this is OK, because in this blog post Etherpad is actually running on the same server, so that unencrypted connection is made internally between the two processes. If Etherpad were running on a separate server, like in a larger environment with dedicated web servers or a load balancer, you’d have to judge the desirability of that unsecured proxy connection—chances are if all your servers are in the same data center, it’d be fine, but it’s still something to be aware of.
There is one anomalous line above which doesn’t really fit in, just below the HTTPS server declaration: ssi on. This activates server-side includes, which is a method of displaying the contents of one file (in other words, “including” the file) inside another file. We’re going to come back to this in a bit.
The last step for this segment is to activate the configuration file we just built. Create a symlink for that file into Nginx’s sites-enabled directory, and then reload Nginx to enable the new file:
$ sudo ln -s /etc/nginx/sites-available/etherpad /etc/nginx/sites-enabled/etherpad
$ sudo /etc/init.d/nginx reload
Taking a breath
You can at this point probably navigate to pad.yourhost.com and try out Etherpad—it should be live and working. However, we’re really only about halfway to where we want to be. We have Etherpad up and running as a service, and we’ve set up our reverse proxy, but we still haven’t yet connected Etherpad to Redis, which is the database system we want it to use. Out of the box, so to speak, Etherpad uses a flat file database, but that doesn’t scale and won’t really stand up to production, so we’ll be changing it shortly. We also haven’t yet implemented a way to see all the active documents in Etherpad. If you hit it up, you’ll notice it’s real easy to start a new pad, but there’s no indication of what pads already exist.
There are semi-complex ways to check for the names of existing pads using a tucked-away admin tool, but that’s kind of obtuse and complex and not very easy to work with. I’ve got a much better method which we’re about to implement, and it has to do with that odd little ssi on line in the Nginx configuration.
Why Redis?
There’s an obvious question to be asked before we go any further: why are we introducing more technology into this stack? Why use Redis as a database, which requires installing more stuff, when we could easily use MySQL instead with only a single config file tweak?
Etherpad Lite stores all of its data—that is, the text contents of all its pads, a running list of all changes to all pads, a list of users, their preferences, and whatever else it needs to keep track of—as a key-value store. Instead of a traditional database with multiple tables, Etherpad creates a big list of keys and then assigns some data to each key, something like this:
key		value
--------------
user1name	bob
user2name	fred
user3name	jorge
Etherpad Lite uses keys and values to track everything. When it’s told to use MySQL as its backend store, it creates one giant table with a “key” column and a “value” column, and stores everything there. Looks like this:
This is rather a waste of MySQL capability. Etherpad Lite doesn’t do any complex joins (obviously, since there’s only one table) or leverage any other SQL functionality; it’s perfectly suited to use a native key-value store for its data rather than shoehorning it into a SQL database of some sort. So, we turn to Redis.
Redis is a very fast in-memory key-value store, sort of like memcache. I chose to use it because for this particular application it’s very easy to set up and configure, and it’s also very quick. With Etherpad Lite potentially doing lots and lots of operations—every change to a pad is recorded, and many people might be editing a pad at the same time—keeping as much of the database in RAM as possible appealed to me. Redis keeps everything in RAM, all the time. This means that it might not be a good fit on a server with memory constraints, so be aware.
Making Node talk to Redis
We need to install a Node.js package to enable our Etherpad’s Node.js instance to talk to Redis, the database we’re going to use for Etherpad to store its pads. The Etherpad Lite maintainers thoughtfully created a database abstraction layer called UeberDB to enable us to use our choice of backend. This is good, but it doesn’t come preconfigured to work with Redis, so we need to give it that capability.
Assuming your Etherpad Lite directory is at /var/www-etherpad-lite, we’re going to navigate deep into the directory structure and then use the Node Package Manager to install Redis support into the UeberDB module. So:
$ cd /var/www-etherpad-lite/src/node_modules/ueberDB/node_modules
$ sudo npm install redis
This should create a redis subdirectory beneath the ueberDB node_modules directory and stash some files in there.
Now that the framework is there and the UeberDB module knows how to interface with Redis, we need to give the UeberDB module a quick lesson in Redis vocabulary, so that it actually knows what to say. Fortunately, the heavy lifting has already been done for us. Copy redis_db.js into the UeberDB directory, at www-etherpad-lite/src/node_modules/ueberDB, and that will take care of that.
Redis persistence
Recall from a moment ago that one of Redis’s key features is that it’s an in-memory datastore. This means exactly that—it keeps its entire data set in RAM. Unless you tell it to do so, it never copies or flushes keys out of memory to disk, and so unless you tell it to do so, your data are never saved on anything non-volatile. This means that if your Redis server reboots, you lose your database.
Well, not really—the designers of Redis, foreseeing that even the Unix boxes with the longest uptimes are vulnerable to power outages, included in the program the ability to automatically save data to disk based on certain conditions. There is an entire big explanation of the hows and whys of Redis persistence over on the main Redis site, but the easiest method to ensure Redis is actually saving data to disk is to ensure that Redis’s snapshotting feature is active. It should be on by default, but take a look inside of /etc/redis/redis.conf and look for the following section:
################################ SNAPSHOTTING  #################################
#
# Save the DB on disk:
#
#   save <seconds> <changes>
#
#   Will save the DB if both the given number of seconds and the given
#   number of write operations against the DB occurred.
#
#   In the example below the behaviour will be to save:
#   after 900 sec (15 min) if at least 1 key changed
#   after 300 sec (5 min) if at least 10 keys changed
#   after 60 sec if at least 10000 keys changed
#
#   Note: you can disable saving at all commenting all the "save" lines.
save 900 1
save 300 10
save 60 10000
I’ve included the default comments because they’re helpful in deciphering what the listed behavior is; as you can see, Redis’s default behavior is to save database to the snapshot file based on time and activity, and the parameters can be adjusted to taste.
Relying only on snapshots can leave you with missing data if you ever have to restore from backup; in fancy-pants datacenter terms, the default parameters give you a variable RPO of between one and fifteen minutes. For non-critical databases this might not be a problem at all, but if you absolutely positively can’t misplace even a single bit in the event of a restore from backup, you’ll also want to enable Redis’s other backup method, the append-only file, which functions like a standard database transaction log. Doing that is beyond the scope of this blog, but you can read more in the Redis docs and also in this blog post.
If you’ve made any changes to Redis’s configuration, bounce the daemon with sudo /etc/init.d/redis-server restart to enable the changes.
Configuring Etherpad Lite
Now that all the pieces are in place, we’re ready to modify Etherpad Lite’s main configuration file and tell it to use Redis. Open up /var/www-etherpad-lite/settings.json and look at the top of the file for the database connection settings, which begin with dbType. There are several default blocks in there already; comment them all out by placing a pair of slashes in front of each line (like //), and add the following:
"dbType" : "redis",
"dbSettings" : {
    "host"		: "localhost",
    "port"		: 6379,
    "database"	: 0
},
There are other settings you can fiddle with in order to change Etherpad’s default behavior, but right now we’re only concerned with the database section. Feel free to poke around on your own, though, and modify whatever you feel should be modified.
Testing
We’re ready to check out and see if everything has come together and if Etherpad works. Using the Upstart job we created, stop and restart Etherpad Lite:
$ sudo etherpad-lite startAnd now, test things out. First, we’ll verify that Etherpad Lite itself is up and running. You can check the Etherpad log files for any anomalies, and if everything looks good, pop open your web browser and navigate to http://webserver:9001, where webserver is the name of your web server, which should connect you directly to the Node.js instance listening on that port for incoming Etherpad traffic. If everything is working, you’ll see a log-on page which will look like this:
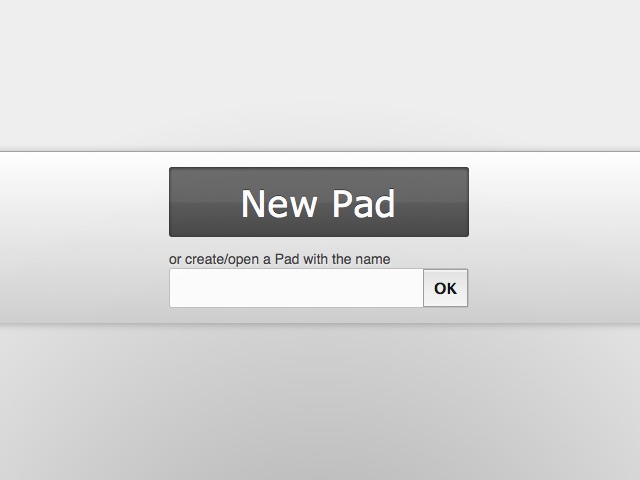
The next step is to make sure Nginx is correctly reverse-proxying, so replace http://webserver:9001 with https://pad.yourdomain.com, the using the vhost from the the Nginx configuration step. If all is well, you’ll see the exact same log-on page.
Showing a list of pads
At this point, Etherpad Lite is fully functional and working, and you could easily stop here and call the project done. However, although it’s obviously very easy to jump in and start creating documents, and easy to share those documents once you’re editing them, there’s no quick and easy way to get Etherpad Lite to display a list of all the existing pads. And wouldn’t it be cool if the elements in that list were hyperlinked to the live pads?
I thought the same thing myself, and so I went hunting for a method to accomplish this. It’s a little hacky, but it works well. The first thing to do is figure out how exactly to list all the pads. Our underlying database is Redis, and Redis has a command line interface that we can query directly, and so it’s easy to make Redis spit out a list of all its current keys:
$ redis-cli keys '*'That’s verbose, but not very helpful. Fortunately, this is Linux, and we have all kinds of text manipulation tools available. Some kind souls on the Etherpad Lite github pages have already done the heavy lifting on how to get a list of all pads using other database systems; we can take the exact same tack with the output from redis-cli:
$ redis-cli keys 'pad:*' |grep -Eo '^pad:[^:]+' |sed -e 's/pad://' |sort
    |uniq -c |sort -rn |awk '{if ($1!="2") {print $2 }}'
That’s more like it! Of course, if you haven’t created any pads then the output is going to be less than impressive, but now that Etherpad is working, you can go and create a few pads and try the command again. It will kick back a list of all the pads you’ve made.
But how do we take this output and do something useful with it? The answer goes back several steps, to the Nginx section of this post, where we turned on server-side includes.
Pad lists and SSIs
We’re on the home stretch now!
We need to shove a server-side include instruction into the actual HTML file that Node.js serves up as the Etherpad-Lite log-on page. We’re going to be sneaky about it, too—Node doesn’t care about SSIs and will ignore the code, but remember that we’re proxying this all through Nginx, and when Nginx receives the HTML page from Node, it will follow the SSI and correctly serve up the included content. Nifty!
The HTML file to modify is located at /var/www-etherpad-lite/src/templates/index.html. Open it up for editing, because we need to make two insertions to the file. The first thing we need to do is insert a bit of CSS, so that the list of pads will look nice and line up correctly. Add the following to the style section:
.padlist {
    text-align: left;
}
.padlist ul {
    list-style-type: none;
    padding:0;
    margin-left:0;
    text-align: left;
    font-weight: bold;
}
.padlist li {
    padding-bottom: 5px;
}
Now for the actual server side include. Locate the wrapper div and modify it by inserting the code listed below:
<div id="wrapper">
    <div id="inner">
        <div id="button" onclick="go2Random()" class="translate">New Pad</div>
            <div id="label" class="translate">or create/open a Pad with the name:</div>
            <form action="#" onsubmit="go2Name();return false;">
            <input type="text" id="padname" autofocus x-webkit-speech>
            <button type="submit">OK</button>
            </form>
<!--Insert these lines-->
            <div class="padlist"><p>List of current pads:
                <ul><!--#include virtual="/static/pads.txt" -->
                </p>
            </div>
<!--Done -->
        </div>
    </div>
<div>
The web server will be looking for /static/pads.txt to contain our included content, so we need to get that file created and keep it up to date, using our long and complicated redis-cli command. Fortunately, there’s an app for that!
The anvil of cron
We’re going to take our long redis-cli command, shove it into a script, and have cron fire it once every 60 seconds. This will get us an always-updated list in just the right spot.
Fire up your favorite text editor and create a bash script, with the following contents:
#! /bin/bash
PADPATH="/var/www-etherpad-lite/src/static/pads.txt"
redis-cli keys 'pad:*' |grep -Eo '^pad:[^:]+' |sed -e 's/pad://' |sort
    |uniq -c |sort -rn |awk '{if ($1!="2") {print $2 }}'
    |sed -e 's/.*/<a href="\/p\/&">&<\/a>/' -e 's/^/<li>/'
    -e 's/$/<\/li>/' > "$PADPATH"
echo "</ul>" >> "$PADPATH"
echo "<p>List updated at $(date "+%R %Z")</p>" >> "$PADPATH"
At first glance this is a bit more complex than a simple redis-cli command, but there are methods to my madness. I wanted to define $PADPATH as a variable, in case I ever needed to change where I want the pads.txt file created at. Right now, the variable points to the static directory inside Etherpad’s web root, so this matches perfectly with the server-side include’s specified location.
The redis-cli command is a bit more complicated and includes a bunch of extra sed commands, because I don’t just want the redis-cli output to be a list—l want it to be a clickable, hyperlinked list. The extra work with sed takes the output list and massages it so that the list names are duplicated and have HTML code appended to them, then also sticks open and close li tags around each list element. Lastly, the script echoes a close ul after the final list item to close the list, and finally appends a paragraph element saying when the script last ran (useful in verifying that the list is up to date without having to check any log files).
Save the script somewhere accessible—in the example above I’m calling it getpads.sh and stashing it in /usr/local/bin, and then modify the system crontab file to execute the script once every minute:
* * * * * root /bin/bash /usr/local/bin/getpads.sh &> /dev/nullWait a minute to ensure the script runs, and then check your Etherpad log-on page. It should now look something like this:
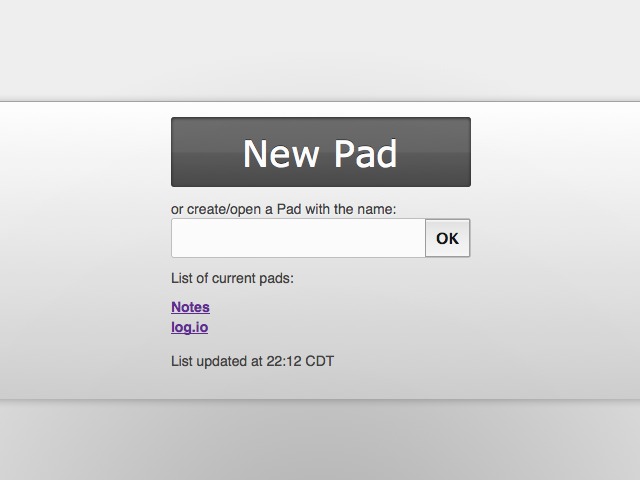
That’s a shot from mine, with the two pads I currently have open. “Notes” is the one I used to write this entire blog entry.
Things left undone
Even though it seems like this is a bloody exhaustive list, there was one thing I couldn’t quite make work, and that’s make Etherpad work with Redis via Unix sockets instead of a TCP port. I’m a firm believer in using Unix sockets wherever possible when getting different daemons to talk to each other on localhost, but try as I might, I just couldn’t get it functioning correctly. Redis itself will happily listen on a Unix socket, but I suspect that the UeberDB translation layer would need to be modified in order to work with a Unix socket instead of a port, and I don’t quite have the ability to make that happen.
Holy crap, that took a long time
I think this actually took longer to document than it took to set up in the first place! I hope this has been a helpful tutorial for anyone interested in a fast Etherpad Lite configuration. I welcome comments and corrections in the comments, especially if anyone actually has any hints on making Etherpad Lite use Unix sockets with Redis.